|

Other aspects of
the LOCKSHOP module are listed and linked
in the column to the left.
The Add/Remove Locations
feature allows lockshop users to identify the locations where
cores
that are keyed to a specific KeyID are located. This feature also stores
this information in a HISTORY should cores be moved. This associating is
unlimited and any number of CORES can be shown.
From in the Key Operations window, with the desired KeyID
selected, click on the Add/Remove Locations link in the left hand column of your
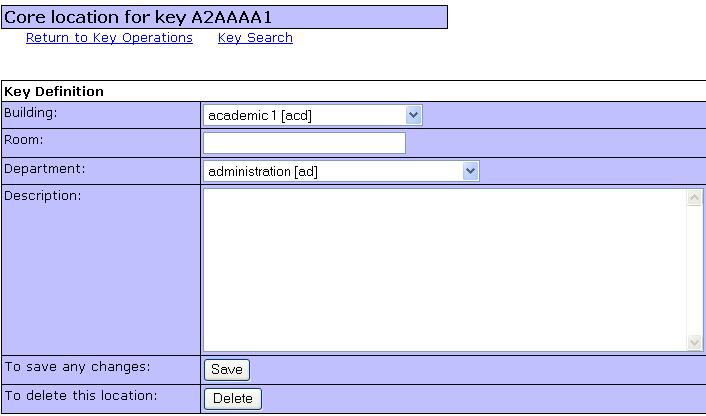
workspace. The following screen will appear:

The KeyID for which information is going to be added or deleted
is indicated in the Horizontal Banner. In this case, A2AAAA1.
ADDING
a CORE LOCATION
-
Select the building in which the CORE is going to be installed
from the Building drop-down menu (this information is created in the Code
Management section of the Systems Manager listings).
-
Type in the Room Number or Signage Designation for the door in
which the Core
is going to be installed.
-
Select a Department from the drop-down menu who is assigned
the KeyID or has Authorization rights over the access to the door.
-
Enter a narrative description specific to the door.
Thing like "Corridor to XXX" and "Tom Jones Office" are typical items that
would be entered here.
-
Click on the [Save] button and the information will be added
to the CORE LOCATIONS list on the Key Operations workspace.
Continue adding CORE INFORMATION for any additional CORES for
this KeyID you have installed.
DELETING a CORE LOCATION
-
The preferred method of Deleting a Core Location is performed
by starting from the Key Operations Workspace.
-
Click on the Facility LINK for the Core you want to delete.
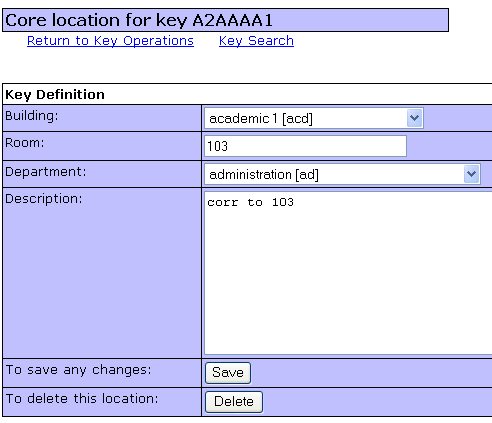
In the case indicated below, lets choose the core which is located in the ACD
building room 103. So click on the KN for that door

-
The associated information for that door will appear something
like this:

-
Click on the [Delete] button, and the location will be removed from your
Core Locations list in the KeyID workspace of the Key Operations screen.
Continue Deleting Core location as needed.
Remember: Core
locations are kept in a History, so the fact that you delete or move a core is
always recorded in the Core History. The Core History Search is performed
from the Key Search link. When the Key Search link is activated there will
be a link configuration at the top of the Key Search screen called Core History
Search, along with Define New Key, Authorization Search and Lost Keys Report.

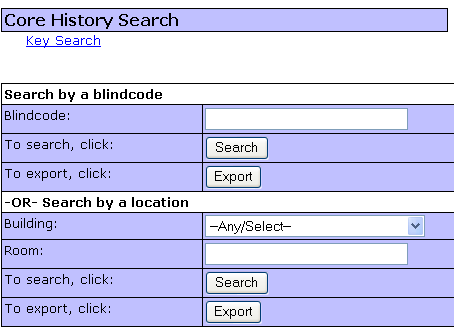
Clicking on the Core History Search will display the following screen:

You may Search by the Blindcode/KeyID information or by a Building and Room
to produce History Reports. As these are common features required by Law
Enforcement, Export button have been added for faster reporting.
|